

0x00. Yubikey + ssh/git (Windows)
TableOfContents
0x00. Intro
For some time now, YubiKeys ( https://www.yubico.com/products/yubikey-5-overview/ ) have been part of my essential device arsenal. Many services like Google, GitHub (web GUI), and others support them out of the box. Additionally, you can generate a certificate on them to authenticate via SSH. However, this requires some extra effort, as neither Linux nor Windows supports this natively. So below, I’ll share a bit about how to set it up in a Windows environment.
From now on, everything will concern PIV and its use via the PKCS#11 interface:
About YubiKey and smart card capabilities
YubiKey 5 NFC, YubiKey 5 Nano, YubiKey 5C, and YubiKey 5C Nano provide Smart Card functionality based on the Personal Identity Verification (PIV) interface specified in NIST SP 800-73, “Cryptographic Algorithms and Key Sizes for PIV.” Performs RSA or ECC sign/decrypt operations using a private key stored on the smart card, through common interfaces such as PKCS#11 (Multi-platform) and a Smart Card Minidriver for Microsoft Windows.
0x01. Yubikey
First, you need to configure the YubiKey itself - change the default PIN codes (in case the YubiKey falls into the wrong hands), then create a certificate and export the public key. All of this can be done on both Windows and Linux, either through a GUI application or using command-line tools. Below, we’ll do this in the Yubikey Manager application for Windows.
Yubikey manager
First, you need to install Yubikey Manager - https://www.yubico.com/support/download/yubikey-manager/
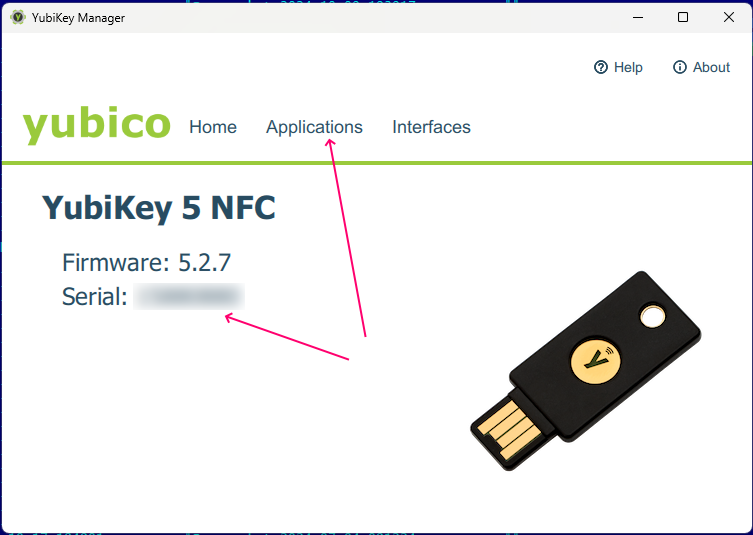
Next, insert the YubiKey into a USB port, launch Yubikey Manager, and if everything is fine, Yubikey Manager will detect the key and display its serial number:
After this, navigate to the Applications/PIV menu:
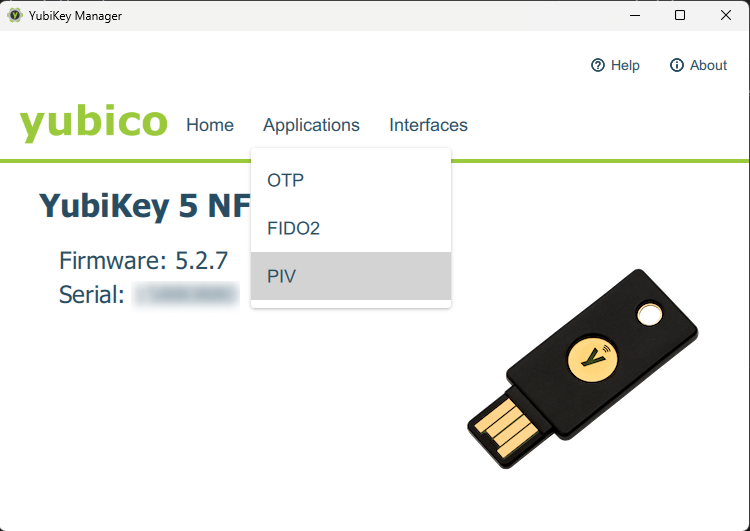
where you will find the PIV management menu for the YubiKey:
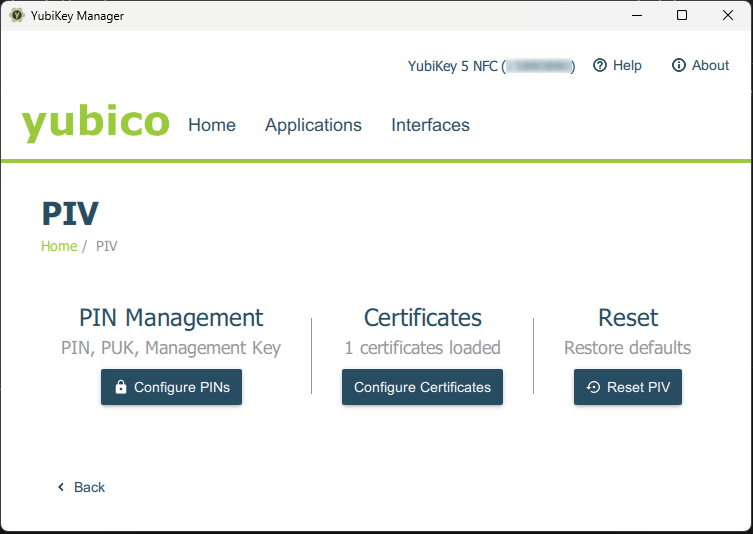
To configure the PINs, go to Pin Management.
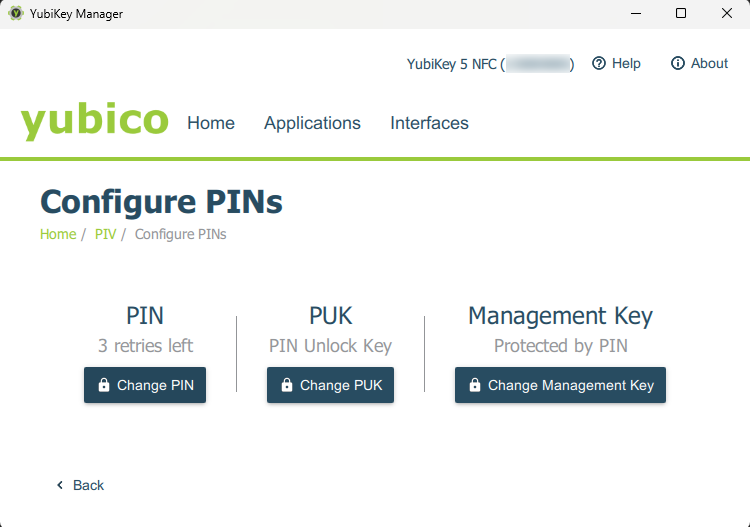
Next, make changes in the following sequence:
- PUK:
current PUK - Use default, as a new YubiKey has the default PUK. Change the PUK first, as updating the PUK resets the PIN. - PIN: similarly —
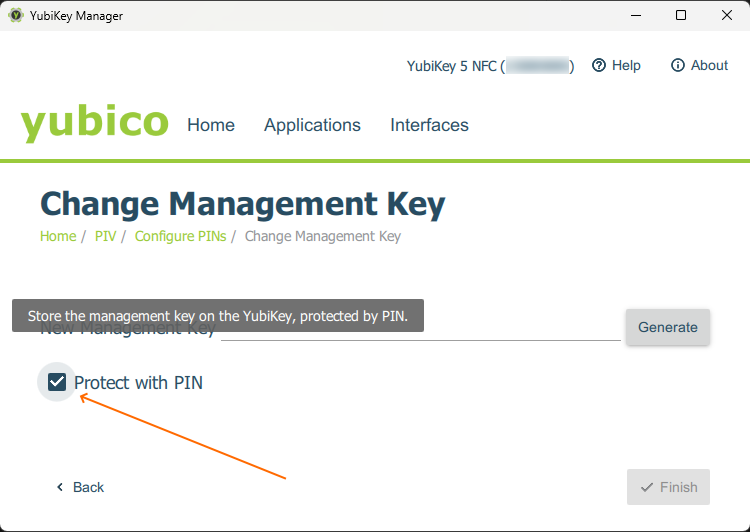
current PIN - Use default. - Management key: check the
Protect with PINbox and then clickGenerate.
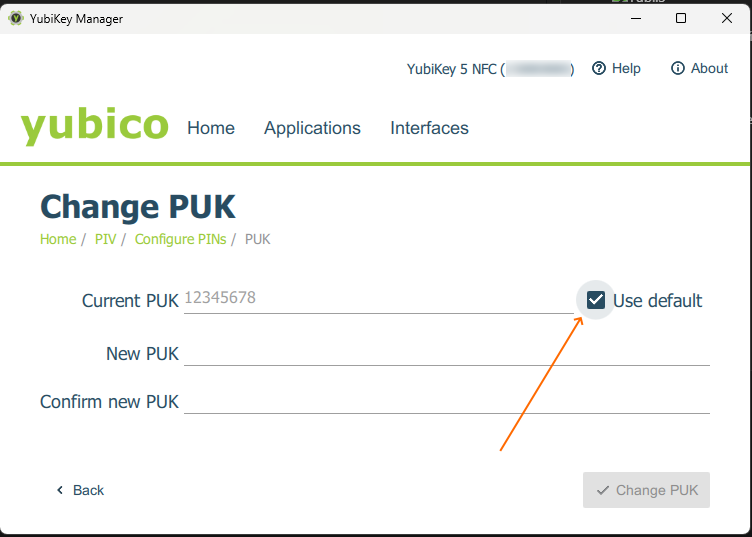
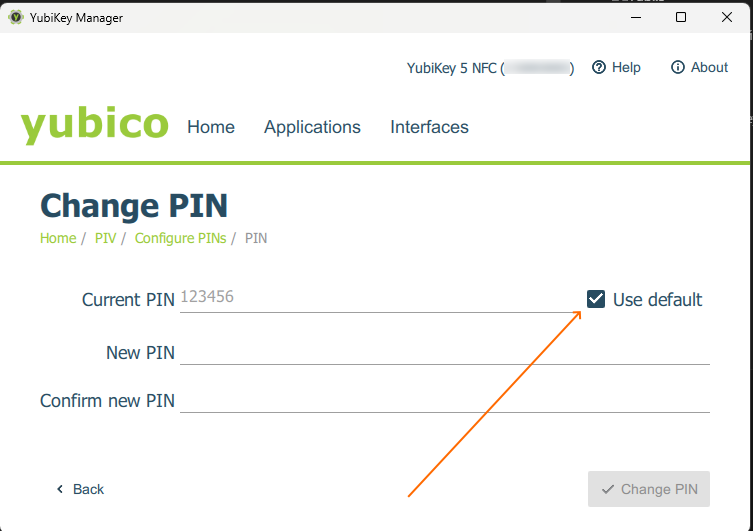
That’s it for PIN configuration. Keep in mind that if you enter the PIN incorrectly three times, it will start asking for the PUK.
If you enter the PUK incorrectly three times, the key (specifically its PIV functionality) will be locked. After this, the only option is to reset the PIV settings to default values, which will result in the loss of all generated certificates.
You can read more details here.
Therefore, it’s advisable not to forget your PINs and PUKs. And under no circumstances should you use the default values.
Certificates
Go back to Application -> PIV
but this time select Certificates:

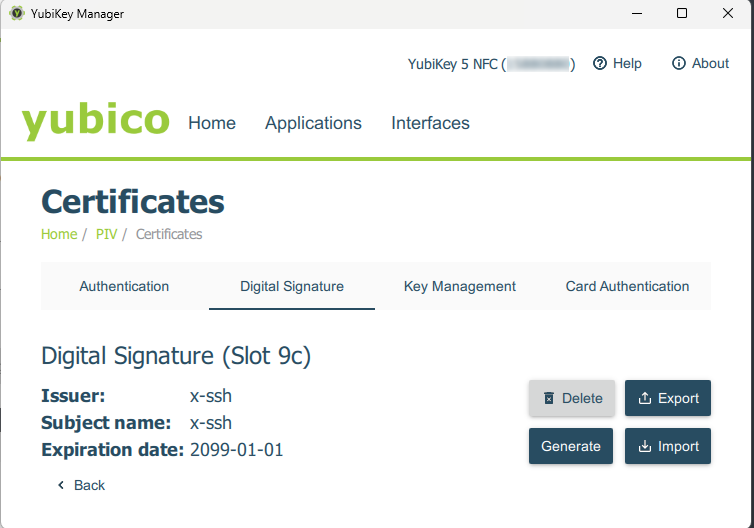
The YubiKey has 4 slots with the numbers 9a, 9c, 9d, 9e (yes, there’s no 9b in this menu %). The slot names and their functional roles/purposes are defined by the relevant standard, more details here.
For SSH authentication purposes, the 9c slot suits me best, rather than the seemingly more obvious 9a, because I want the PIN code to be requested every time the private key is used (paranoia works that way).
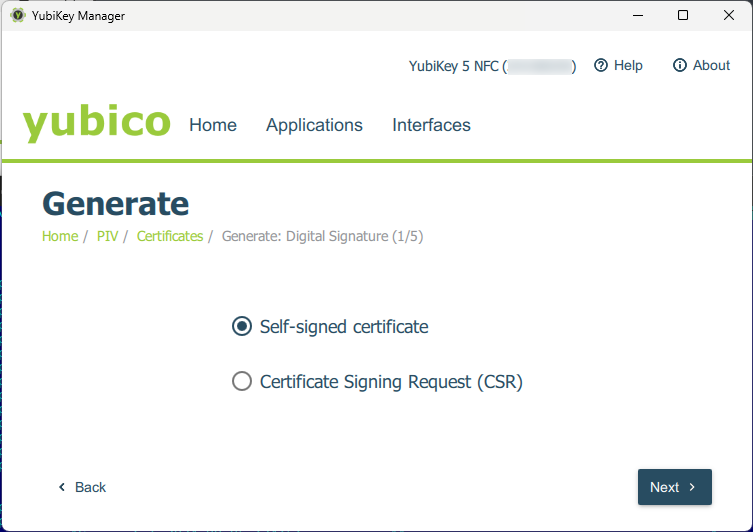
Next, it’s simple—select the 9c slot (the Digital Signature tab):
Click Generate and choose the Self-signed type (a self-signed certificate):
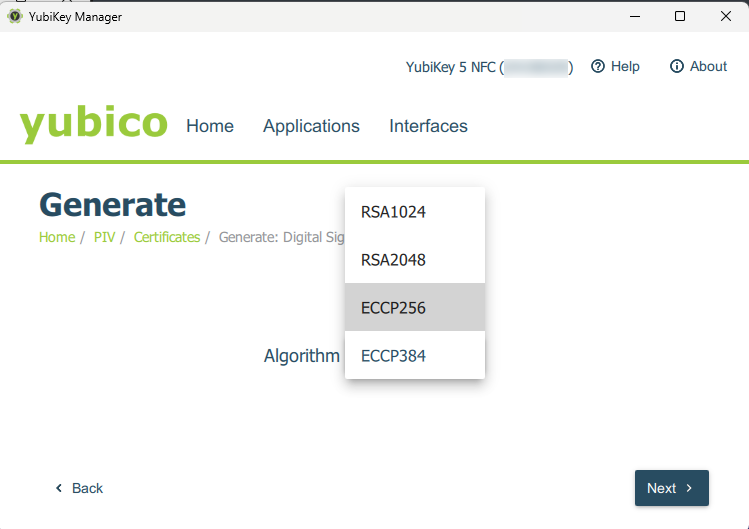
Then select the algorithm; currently, elliptic curve-based (ECCP) algorithms are recommended:
Next, create a Subject:

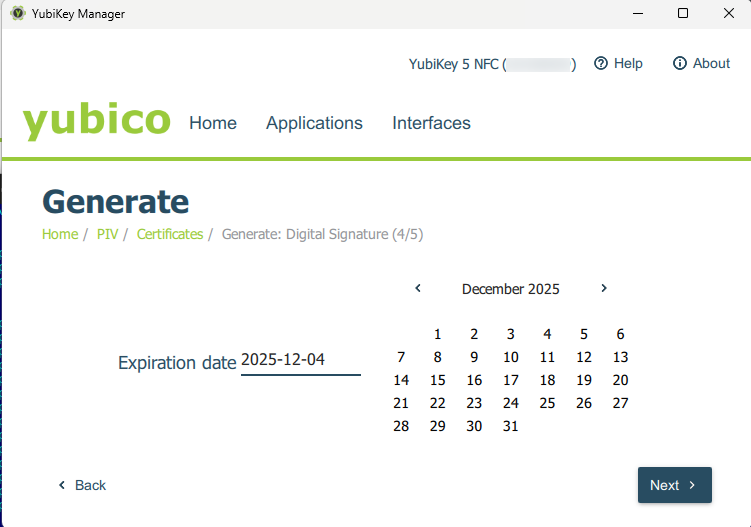
and set the desired certificate validity period:
Then click Generate:
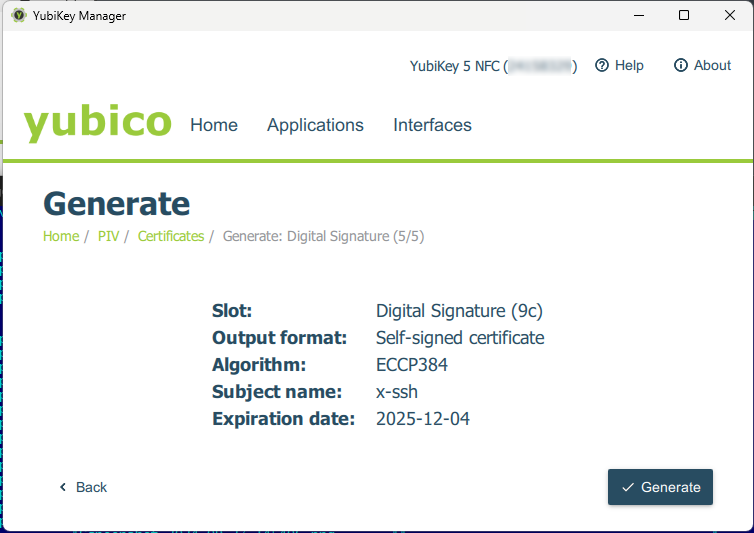
and the certificate is generated and saved on the key. If necessary, it can be exported, for instance, to import it onto another YubiKey, but it’s better not to do this because it undermines the purpose of using a YubiKey.
Each certificate should exist as a single instance on a separate YubiKey, with its own PIN/PUK codes.
If you need multiple YubiKeys (and it’s advisable to have two — a primary and a backup), then each should have its own certificate.
This way, if you lose one YubiKey, you can simply revoke its access everywhere without needing to regenerate certificates on all YubiKeys.
0x02. OpenSSH
Let’s consider the scenario where we want to use YubiKey to access remote SSH servers (like GitHub, for example) from a Windows client.
By default, Windows almost never has an SSH client installed.
So first, we need to install it. On Win10/Win11, it’s been available for a while under System Settings -> Optional features:
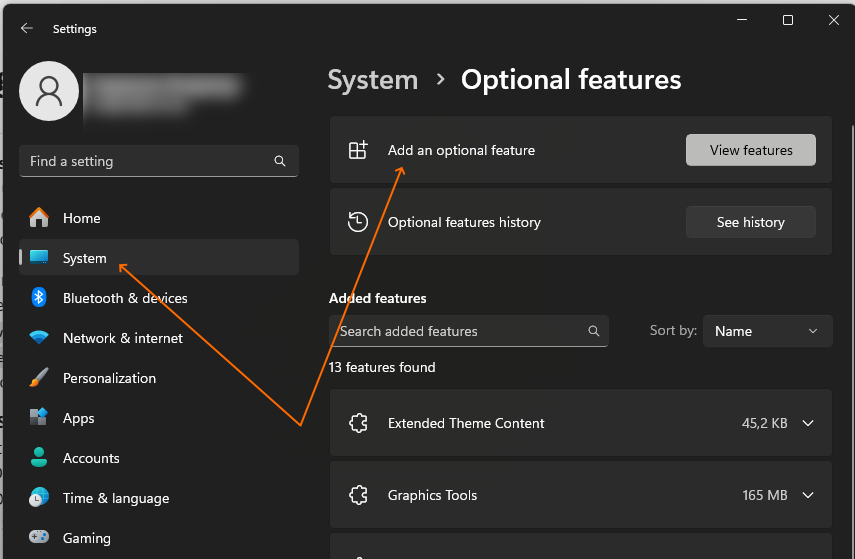
There, select OpenSSH Client and activate it, or simply do it with a single PowerShell command (the first command just checks if the feature is installed and what version is available):
PS C:\WINDOWS\system32> Get-WindowsCapability -Online | Where-Object Name -like 'OpenSSH*'


Name  : OpenSSH.Client~~~~0.0.1.0
State : Installed

Name  : OpenSSH.Server~~~~0.0.1.0
State : NotPresent


PS C:\WINDOWS\system32> Add-WindowsCapability -Online -Name OpenSSH.Client~~~~0.0.1.0
If everything is fine, the following output should appear when running these commands:
PS C:\WINDOWS\system32> ssh -V
OpenSSH_for_Windows_9.5p1, LibreSSL 3.8.2
PS C:\WINDOWS\system32> ssh -T git@github.com
git@github.com: Permission denied (publickey).
PS C:\WINDOWS\system32>
The first command shows the version of the SSH client, and the second attempts to connect to GitHub. Since we just installed the SSH client and GitHub currently works only with keys (or tokens, but that’s another topic), we receive a permission denial.
In principle, we could generate a key file and place its public part in the %USERPROFILE%/.ssh folder (i.e., the .ssh directory in the home directory).
PS: if after OpenSSH client installation the .ssh folder does not exists just create it manually.
You can read more details in Connect with SSH.
However, since we already have a certificate on the YubiKey, we just need to connect the YubiKey to the OpenSSH client.
0x03. PKCS#11
Here, there’s a slight difference depending on whether you’re on Windows or Linux.
yubico-piv-tool
First, you need to install the PIV driver for YubiKeys:
https://developers.yubico.com/yubico-piv-tool/Releases/
In my case, it’s yubico-piv-tool-2.6.1-win64.msi.
Next, I added the path where it was installed to the default paths, although this is not mandatory:
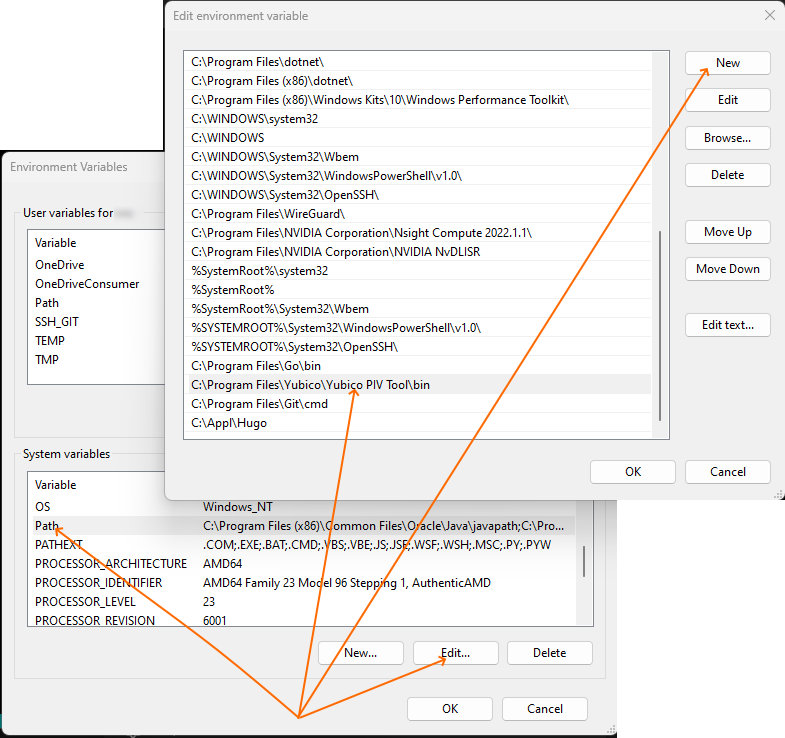
Then, in the user’s home directory under the .ssh folder (created when installing the OpenSSH client), create a config file with the following line:
PS C:\> cat ~/.ssh/config
PKCS11Provider "C:\Program Files\Yubico\Yubico PIV Tool\bin\libykcs11.dll"
PS C:\>
In this case, the OpenSSH client will first check whether the YubiKey is connected and whether its certificate is valid for accessing the remote server.
If everything is fine, it will prompt for your PIN code during connection. If the YubiKey is absent or its certificate is invalid, the connection will proceed as usual.
However, you’ll need to add the public key of the certificate we generated earlier to the remote servers.
Public Key
To retrieve the public key from the YubiKey, execute:
ssh-keygen -D libykcs11.dll -e
or if you haven’t added it to the default paths, then
ssh-keygen -D "C:\Program Files\Yubico\Yubico PIV Tool\bin\libykcs11.dll" -e
as a result, you’ll get something like:
PS C:\> ssh-keygen -D libykcs11.dll -e
ecdsa-sha2-nistp256 AAAAE2VjZHNhLXNoYTI.......q0= Public key for Digital Signature
ssh-rsa AAAAB3NzaC1yc2EAAAADAQABAAABAQC......./hZ Public key for PIV Attestation
PS C:\>
where the public key is the first line (since we created the key in the 9c slot — Digital Signature).
Add the entire line! to the servers where you need access via YubiKey.
Optionally (and preferably), replace the phrase “Public key for Digital Signature” with something more informative, such as the name of the user to whom the key belongs.
github
For GitHub — as described here
- In the upper-right corner of any page on GitHub, click your profile photo, then click Settings.
- In the “Access” section of the sidebar, click SSH and GPG keys.
- Click New SSH key or Add SSH key.
- In the “Title” field, add a descriptive label for the new key. For example, if you’re using a personal laptop, you might call this key “Personal laptop”.
- Select the type of key, either authentication or signing. For more information about commit signing, see “About commit signature verification.”
- In the “Key” field, paste your public key.
- Click Add SSH key.
- If prompted, confirm access to your account on GitHub. For more information, see “Sudo mode.”
After this, the test should produce:
PS C:\> ssh -T git@github.com
Enter PIN for 'YubiKey PIV #XXXXXXXXX':
Hi YYYYYY! You've successfully authenticated, but GitHub does not provide shell access.
PS C:\>
This means that the YubiKey can now be used with the git command.
To anyone who read this to the end — thank you so much for your time; I hope it wasn’t wasted!
P.S. This post was pushed to GitHub using the YubiKey. The translation — courtesy of a great guy, ChatGPT %)